| |
How
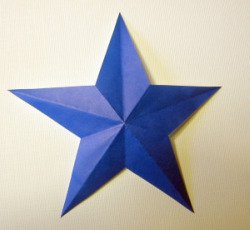
to Make the One-Cut
Betsy Ross Star
There are plenty of instructions on the Web
for the 5-pointed Betsy Ross Star, but we think you've found the best
instructions right here.
We've eliminated unnecessary creases that
spoil the finished star, and we provide a template that takes the
guesswork out of making a perfect straight-armed star.
The story goes that George Washington asked
Betsy Ross to make a flag
that had a 6-point star.
 Betsy is supposed to have shown him how
easily a perfect 5-point star could be made with a simple folding process and one snip.
And that, some say,
is how the stars on the American flag came to
be.
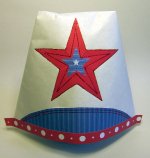
Click for hat instructions. Betsy is supposed to have shown him how
easily a perfect 5-point star could be made with a simple folding process and one snip.
And that, some say,
is how the stars on the American flag came to
be.
Click for hat instructions.
We want to acknowledge Arnold Tubis for
inspiring us
to delve into the process of making the Betsy Ross star.
To paraphrase Dr. Tubis, the star is a fascinating blend of origami
and American history.
Materials
- One piece of thin, rectangular paper. 8½ x 10 inches is the
size that seems to have historical significance. You can get
satisfactory results from an 8½ x 11 piece, too.
Paper 8½ inches wide makes
a
star up to 8½ inches across. You can make smaller stars by
adjusting where you make the one-snip, as explained in the instructions
below.
Likewise, a piece of standard 6-inch origami paper with one edge cut to
4¾ inches makes a star up to 4¾ inches across.
- Piece of cardboard, such as from a cereal box, about
2 x 5 inches
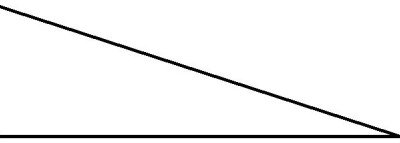
Making the One-Cut Template
Cut a wedge of cardboard matching the angle below.
You can print this image or use a protractor to make a 18-degree
angle.
Tip: Save ink!
Before printing this entire page, right-click on the angle below and
check your browser options. In Internet Explorer, there is an option to
print the picture. On a Mac in Safari, you can right-click and choose Open Image in New Window and print from there.
How To Fold and Cut the
Betsy Ross Star
|
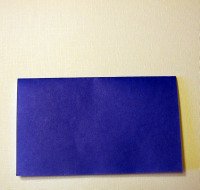
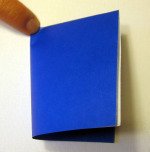
1.
Even if your paper has color on
one side, it doesn't matter which side is up.
Fold in half, short side to short side.
|
|
|
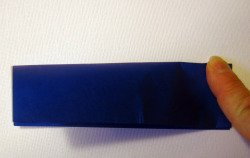
2. With the folded edge
at the top, fold in half again,
side to side, but do not crease.
Only make a tiny pinch crease with the tip of your finger to mark the
center of the folded edge.
|
|
|
3. Unfold.
|

|
|
4.
Fold in half, top to bottom, but do not crease.
Make a small pinch crease on the right side. This crease can be a
little longer than the previous one.
|
 |
|
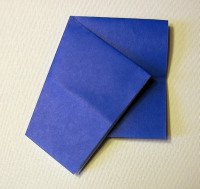
5.
Unfold. Be sure the folded
edge is at the top.
Using the two pinch creases as guides, fold the upper left corner to
the side crease, forming a point at the center-top pinch crease.
|
|
|
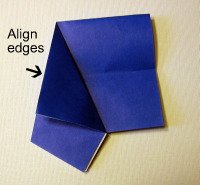
6. Fold the same corner to the
left edge, forming a triangle.
Align the two edges perfectly. Make the top point of the triangle
as neat and sharp as possible.
|
|
|
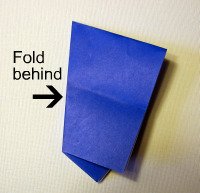
7.
Fold the
triangular wedge behind, aligning the new fold perfectly with the edge
of the triangle.
|
|
|
8. Fold the right corner to the left
edge, perfectly aligning the edges indicated by the arrow, and keeping
the point sharp.
Tip: If
you are working with thicker paper, this may be difficult. Just
do the best you can.
|

|
|
9.
Lay your cardboard template on the piece, aligning it with the right
edges.
Peek under the top two flaps and note the corner underneath, as
indicated by the
arrow.
Make sure the template is above the corner.
Mark the cut line by tracing along the left edge of the template with a
sharp pencil or pen.
|
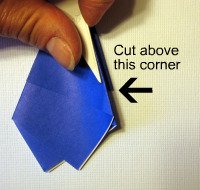
Tip:
By sliding the template up toward the tip, you can make a smaller star.
|
|
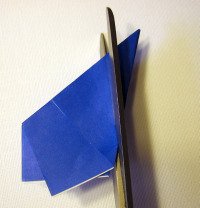
11. Cut slightly to the right of
the pencil line.
This ensures the pencil mark is not on your star.
|
|
|
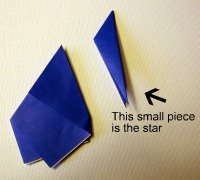
12.
Unfold the
small piece to reveal your Betsy Ross Star!
Tip: If the
arms of the star are not exactly the same length, the paper may have
slipped as you cut. You can refold the star and tweak the cut.
|
|
|
You
can make a second, small star and
an outline star by cutting
another wedge before unfolding.
|

|
Back to top of Betsy Ross Star
Browse
the
Origami Model Library
All About
Origami Home

|
