| |
How
to Fold an Origami Box
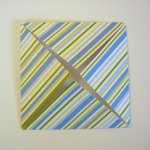
Traditional Masu
 The
traditional origami box, the masu, may have originated as a way to
measure rice. The
traditional origami box, the masu, may have originated as a way to
measure rice.
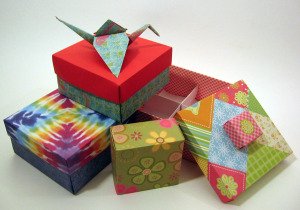
You can make a masu from origami paper or
any of the other beautiful papers available.
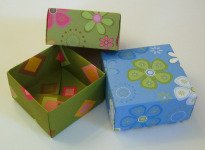
Everything in this box pile was made from
scrapbook paper or colored photocopy paper. The red lid is
photocopy paper.
See the tiny box on the lid on the right?
It looks like a pull knob. It's actually a little masu that opens,
too - like a secret compartment! We just glued it on and
decorated it with a flower cut from a scrap.
When
you give someone a gift in a homemade origami box, it becomes two gifts
in one...and truly unique. A box alone is a beautiful gift.
On this page, our origami artist and
instructor, Barb, shares her
tips for making a beautiful, sturdy origami box. Have fun!
Materials
- One piece of perfectly square paper for the box
bottom.
- If you want a lid, another piece of perfectly square
paper.
If you want the lid to
completely cover the box bottom, use a piece the same size as the one
for the bottom.
If you want a lid that allows the sides of the box bottom to show, use
a piece smaller than the one for the bottom.
For example, for the large boxes in the photo above, I used a piece of
12-inch square scrapbook paper for the box bottoms. The box lids
are from 8½-inch squares. This makes a box 4¼ inches square
by about 2 inches tall.
The small green box in the photo is made from two pieces of 8-inch
square paper. This makes a box almost 3 inches square and 1½ inches
tall.
- To make the box really sturdy, you'll need some thin cardboard,
such as from a cereal box. You need enough to cut one piece the
size of the bottom, and four pieces for the sides. You can
reinforce the lid the same way.
|
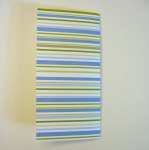
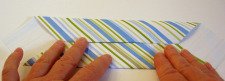
1.
Start with the paper white side
up. Fold in half, side to side.
I'm
using a piece of 8-inch square scrapbook paper.
|
|
|
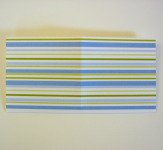
2. Unfold. Fold in half
again, top to
bottom.
|
|
|
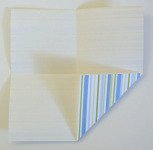
3. Unfold. Fold a corner exactly to the
middle point.
Carefully align the edges of the triangle with the creases you made
previously.
|
|
|
4.
Fold the other three corners the
same way.
This is called a blintz fold.
(If you came here from other instructions, click your browser's Back button to return.)
|
 |
|
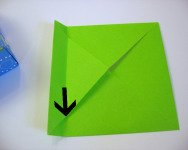
5.
Fold one side exactly to the
middle point.
Align the sides of the flap with the sides of the main
part, as indicated by the arrows.
Crease well.
Unfold and repeat on the other
three sides.
Tip: You now
have all the creases that are needed for the finished box. For best
results, do not make any new creases!
|
  |
|
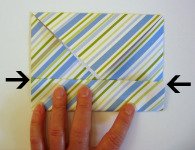
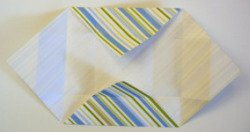
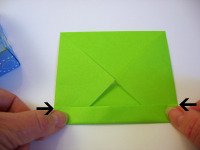
6. Unfold two opposite corners.
|
|
|
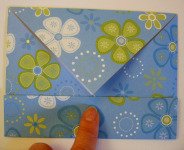
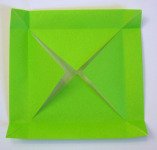
7.
Fold in two
opposite sides - on existing creases - and
re-crease.
|
|
|
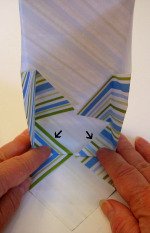
8. Turn the piece to put one of the
corners toward you.
Open the sides into final position (approximately).
Grab with both hands as shown in the first photo. Bring the points of the two triangular sections together (arrows).
The box will come up on end.
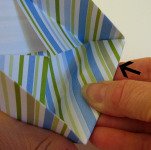
Viewed from an angle, it looks like this: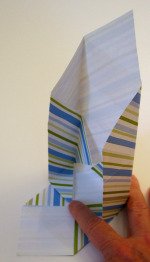
|
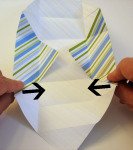
Be sure to use the existing creases.
There should be two neat triangles, with no white side showing, where indicated by the
arrows above.
|
|
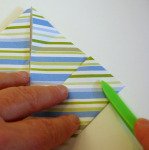
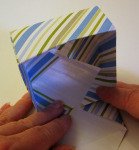
9.
Brace the bottom of the box with one hand.
With the other hand, lift the corner flap and push it into the box.
Tip: Notice
the arrow in the second photo. It's pointing to the existing
crease that should be exactly at the top of this edge of the box.
If it's not, try a technique that I call "coin rubbing." My thumb
is pushing the paper into the box (the same direction as the arrow),
while the fingers underneath are pulling in the opposite direction.
Once
you are satisfied with this side of the box, use a creasing tool all
around the edges. This makes an especially nice, neat box.
|


|
|
10.
Repeat Steps 8 and 9 on the remaining side.
|
|
|
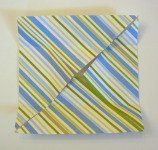
11.
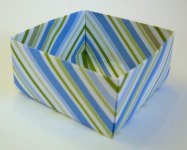
Crease
everything well...and you did it!
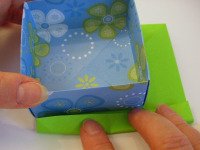
To make your origami box really sturdy, add cardboard inserts: Carefully measure the bottom and sides and
cut pieces of thin cardboard. Cut them a tiny bit smaller than
what you measured!
Unfold the box and add the cardboard pieces as you refold. It's amazing what a difference it makes!
|
|
|
12.
For
the lid, fold the paper the same until Step 5. You need to
make the lid a tiny bit bigger than the
bottom.
Do this by folding the sides not quite all the way to the
center. About 1/8-inch short of the center usually works for
thicker papers.
Making a lid that fits snugly, but not so snugly that the sides buckle,
can be tricky.
If you don't like how the lid fits, try rotating it a quarter turn.
|
|
|
13. Here's how to make a lid that
allows the sides of the box bottom to show.
I started with a box bottom made from an 8-inch square. I used a
sheet of regular 6-inch origami paper to make the lid.
A flower made by one of my students was
the perfect finishing touch for this origami box.
|
 |
|
14.
After folding the top through
Step 4 (the blintz fold), set the box bottom on it.
I'm using the fingers of my left hand to hold the box bottom exactly
aligned with the upper left corner of the lid piece.
Use your right hand to fold the edge to the side of the box, but not
too tightly. Leave a little "breathing room."
|
Just make a soft crease at
this step.
|
|
15.
Set the box bottom aside. Align the sides of the flap with the edges of the main
part, as indicated by the arrows.
Crease well.
|
|
|
16.
Repeat
Steps 14 and 15 on the other three sides.
Tip:
Here's a way to fold the remaining three sides without using the box
bottom:
Notice the intersection of the cut edges with the new crease.
This
is the point through which you will fold each remaining side, working
your way around the piece.
|
|
|
17. Finish folding the lid the same way beginning at
Step 8. It might seem different or trickier because the sides are so narrow.
Just remember: Use the existing creases.
Have fun making more origami boxes. Practice makes perfect!
| 
|
Back to top of Origami Box
Browse
the
Origami Model Library
All About
Origami Home

|
