
How to Fold an
Origami
|

 This
display stand is a fabulous device for displaying all kinds of origami
models.
This
display stand is a fabulous device for displaying all kinds of origami
models. It's an ideal surface for writing a

|
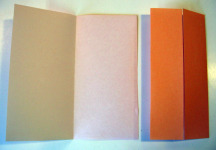
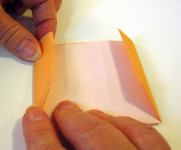
1. Fold the paper in half to make a center crease. 2. Unfold. 3. Fold in both sides to meet the center crease. 4. Unfold. |
|
|
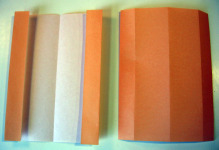
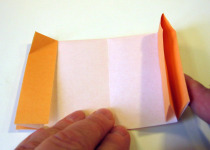
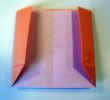
5. Fold in both sides to meet the creases you just made. |
|
|
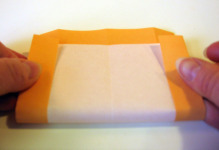
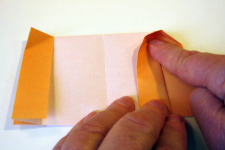
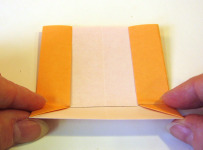
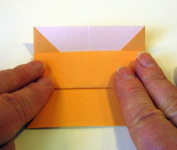
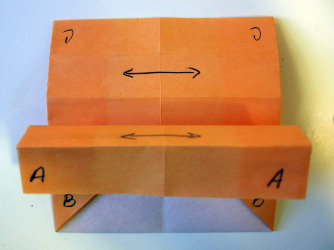
7. Fold the entire thing in half, by folding the lower half up to meet the top edge. |
|
|
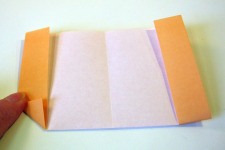
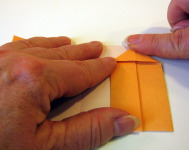
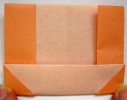
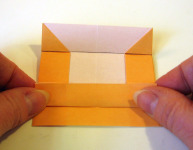
8. Fold
the corner in, even with the cut edge of the paper (or, if you are making the placecard variation, to the crease line that is closer to the middle). 9. Unfold. 10. Repeat on the opposite corner. |
|
|
11. Spin
the model around to put the folded edge away from you.
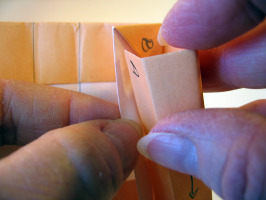
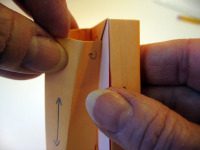
12. Lift
up one side and...
|
|
|
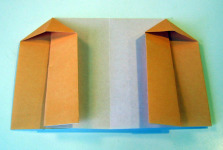
13. Squash fold a little triangle. Use the helper creases you made in Step 8. |
|
|
14. Repeat Steps 12 and 13 on the other side. |
|
|
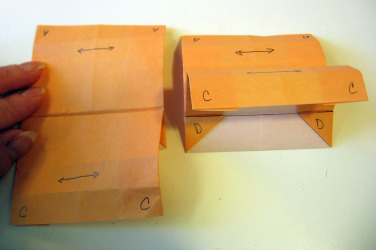
15. Turn the model over and spin it around to put the folded edge toward you. |
|
|
16. Fold both sides in using the existing crease. |
|
|
17. Fold
the bottom edge up, even with the bases of the little triangles.
|
|
|
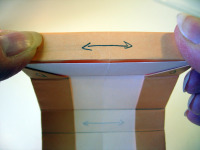
18. Spin the model around again. 19. Working with the top layer, fold the bottom edge up to meet the crease you just made. 20. Unfold. |
|
|
21. Fold the edge up to meet the crease you just made. |
|
|
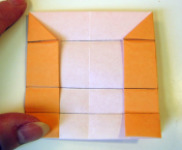
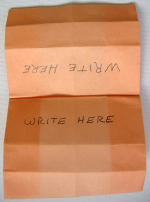
22. You should have these creases. 23. Turn the model over and repeat Steps 16-20 on the other side. Guess what? The folding is done. Just a bit of assembly is required. This is the stage at which you could write on it, such as a message or name for a place card. This is also the stage to which you could return it for mailing or for storage in a flattened state. Important: Before writing a message on it, make
sure you know which end is up! Fold back the
top layer to reveal the message areas. |
|
|
24. If you’re going to be sending this to someone with assembly instructions, or to help yourself do it the first time, turn the model over and label it as shown. As
and Bs on one side, Cs and Ds on the other. Plus,
the double-headed arrows between
the pairs of creases. |
|


If you are mailing the stand to someone, print the following instructions and include them for the recipient.
Origami
Display
Stand
Assembly Instructions
Back to top
|
1.
Insert Corners A into |
|
|
2. A good tug, as indicated by the double-headed arrow, will help get it smooth and secure. |
|
|
3. Insert
Corners C into |
|
|
4. Set
the stand on the arrows. They
indicate the bottom of the stand. 5.
Insert the
decorative piece(s) into the slot at the top.
|
|

Size
Variations (width x height)
Back to top
Note:
If this is your first time making a stand, we recommend making one from
the standard instructions using a square piece of paper before attempting these variations!
For
a 3¼ x 2 inch stand
 This
is a good size for place cards or for writing a
message.
This
is a good size for place cards or for writing a
message.
Use an 8½ x 11 inch piece of paper and place it in portrait orientation.
Start with these
instructions:
1. Fold in the left and right sides 1”. Do not unfold.
2. Fold in the sides 1½ inches. Unfold this step only.
3. Fold the remainder the same as the standard instructions beginning at Step 6. Be sure to fold to the crease line at Step 8.
For
a 5½ x 1¾ inch stand
 Use
a 8½ x 11 inch piece of paper and place it in landscape
orientation.
Use
a 8½ x 11 inch piece of paper and place it in landscape
orientation.
There is only one change to the standard instructions:
- At Step 21, fold the edge up 1 inch only.
For
a 6 x 1½ inch
stand
 Use an 8½ x 11 inch
piece of paper and place it in landscape
orientation.
Use an 8½ x 11 inch
piece of paper and place it in landscape
orientation.
Modify the standard instructions as follows:
1. Skip Steps 1 and 2.
2. At Step 3, fold the sides in 2½ inches.
3. The rest is folded the same as the standard instructions.
Click
to browse our Origami Model Library