Origami Folding Tips
Like so many things, making good folds comes with practice.
For a great finished project, each and every fold, from the very first to the last, should be made carefully and deliberately.
A flat surface is usually considered a must, but some people are quite good at folding in the air.
Make a soft crease before committing to the final – or hard- crease. If a fold is slightly off, it’s usually worthwhile to unfold it and re-do it.
If it’s totally off the mark – a real boo-boo – it might best to discard that piece of paper and start over. A crease from a fold that was way off the mark can cause more confusion than it’s worth.
Look for the symmetry in the folds. Not only does this help you understand what to do, it’s a big part of the beauty and appeal of origami.
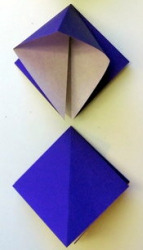
For example, a tricky fold for beginners is the squash fold, such as this one in the square base.
You will usually squash into a familiar geometric shape, such as a square, rectangle, or diamond, not some random blob. Strive for that perfect geometric shape as you squash.
Before making some folds, including the squash fold, you will often make what we call “helper creases.” These are folds you make and then undo. The resulting creases help later folds fall into place.
Use the helper creases. If you introduce new creases at a step that uses helpers, you’ve probably made a major boo-boo.
For creasing, the best tool is probably the back of your thumbnail. Some people like a tool made of bone.
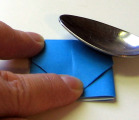 We like the back of a spoon, or the curved part of a plastic image transfer tool, like the green one below, either of which can really help make good creases when the paper gets thick.
This inexpensive green plastic tool is our favorite all-purpose folding tool. We found it at our local "big-box" craft store in the scrapbook department in a pack of two. Some stores might carry it in white.
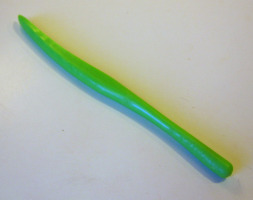
Besides having a curved surface for creasing, the pointy end is good for lifting edges and for scoring thick papers before folding.
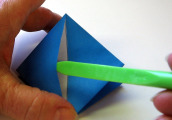
The blunt end of this tool, or the eraser end of a pencil, can help open the corners of squash folds.
The pointy end of a chopstick is also a handy tool when making tiny origami models. And it's great for curling flower petals.
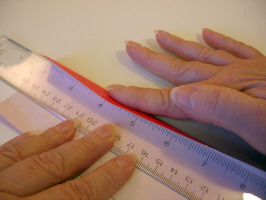
A clear plastic ruler can help get tiny folds nice and straight and help make long skinny folds.
Return to Origami Basics from Origami Folding Tips
All About Origami Home
Enjoy this page? Please pay it forward. Here's how...
Would you prefer to share this page with others by linking to it?
- Click on the HTML link code below.
- Copy and paste it, adding a note of your own, into your blog, a Web page, forums, a blog comment,
your Facebook account, or anywhere that someone would find this page valuable.


 We like the back of a spoon, or the curved part of a plastic image transfer tool, like the green one below, either of which can really help make good creases when the paper gets thick.