
How
to Fold an
|

|
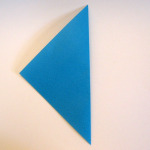
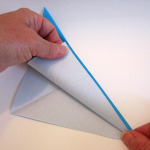
1. Start with the paper white side up. Fold in half, corner to corner.
|
 |
|
2. Fold in half again.
|
 |
|
3. Unfold the last step.
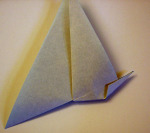
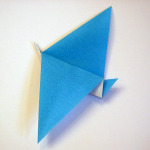
|
 |
|
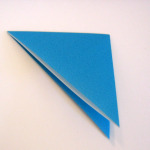
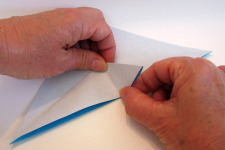
4.
Fold the lower left edge to the
folded edge.
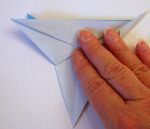
|
  |
|
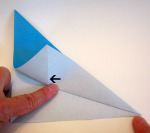
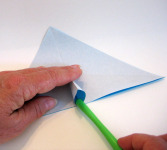
5.
Unfold the last step.
Repeat the last step on the adjacent side.
|
  |
|
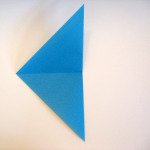
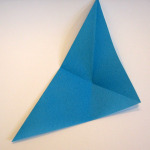
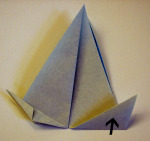
6. Starting from the outer corners, refold the two creases.
|
|
|
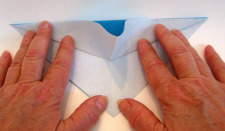
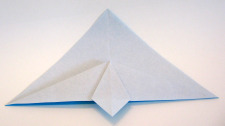
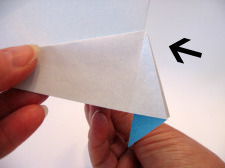
7.
Squeeze the
triangle flat.
|
 |
|
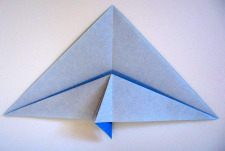
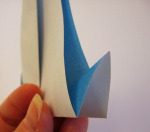
8. Open the triangle and squash fold it
into a little kite shape.
|
  |
|
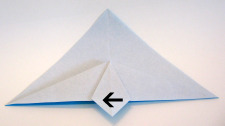
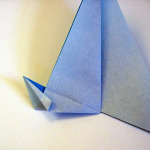
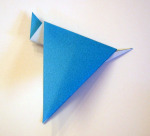
9.
Fold the little kite in half. |
  |
|
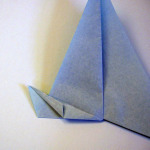
10.
Pick it up and fold the right half behind. Allow the half-kite to
hang down. Result: |
 |
|
11.
Now make
two tiny folds to form the pointy nose of the jet.
|
  |
|
12.
Turn over and repeat the two
folds on the other side. |
 |
|
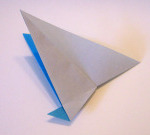
13.
Now we're going to form the tail
using an inside reverse fold.
|
 |
|
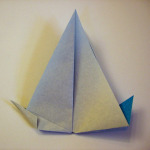
14.
Unfold and push the tail up
between the wings, using the creases you made in the last step.
|
 |
|
15.
Fold the top wing down on the
line indicated.
|
 |
|
16.
Turn over and repeat on the
other side. |
 |
|
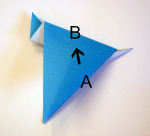
17. Fold edge A to edge B.
|
 |
|
18.
Turn over and repeat on the
other side. |
 |
|
19.
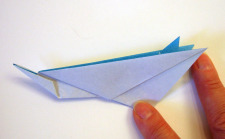
Grab two layers and fold down. |
 |
|
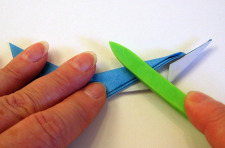
20.
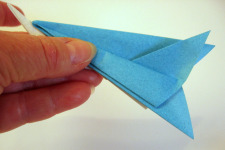
Fold the top layer back as shown. |
 |
|
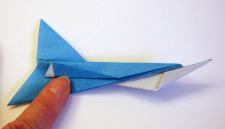
21.
Turn over and repeat the two
folds on the other side.
|
  |
|
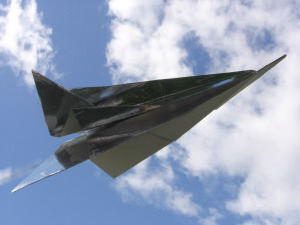
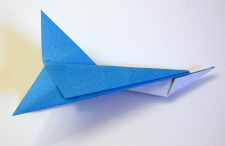
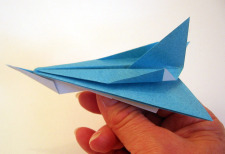
22.
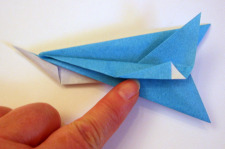
The folding is done! Open
the wings out and your origami jet plane is cleared for take off!
|
 |
Back to top of Origami Jet Plane
