
How to Fold an
Origami
|
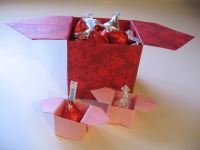 It’s an intriguing model in that it has a
“false bottom,” meaning it’s not as deep as it looks from the outside.
It’s an intriguing model in that it has a
“false bottom,” meaning it’s not as deep as it looks from the outside.|
1. Begin with the white side of the paper up. 2. Fold the paper in half, side-to-side, both ways, and unfold. You should have the creases shown. |
|
|
3. Fold all four corners in to meet at the center. Tip: Take your time to keep your folds and corners as neat and perfect as possible. |
 |
|
4. Turn the paper over and orient as shown. |
|
|
5. Fold
the model in half by folding the lower triangle up. |
 |
|
6. Fold it in half again so you have a really small triangle. |
|
|
7. Important: Spin it around so the open edges are away from you. You should see only folded edges and none of the white side. |
 |
|
8. Open the upper triangle and squash it into a square. Tip: This step is exactly like the squash fold in the square base, but the paper is two layers thick. If you are working with thick paper, a pencil or similar object can help smooth out the corners before squashing. |
|
|
9. Your model should look like this. |
|
|
10. Turn the model over and repeat the squash fold on the other side. Pick up the triangle (looks like a sundial at this point), open it, and squash. |
  |
|
11. You should have a thick little square. |
|
|
12. Important: Spin it around so the open end is away from you. |
|
|
13. Insert your finger, or a tool, in the slit in the paper to where you can see the white side. This can be tricky. Take your time working your fingers in there. |
|
|
14. Spread the edges apart to where you can get both thumbs inside and continue pulling the pocket open. |
|
|
15. Squash
into a rectangle. |
|
|
16. Turn the model over and repeat making the rectangle on the other side.
|
|
|
17. Turn the sides of the house like pages in a magazine...
...until you have a solid roof and two layers on each side. |
|
|
18. Working with the top layer, fold the sides in to meet the center crease. |
|
|
19. Turn
it over and repeat on the other side.
You have an arrow shape pointing up. |
|
|
20. Fold down the upper tip of the arrow. |
|
|
21. Turn it over and repeat. A spoon can really help with these creases. |
|
|
22. Now for the fun part! Expand the dish. Pick it up, stick your fingers in the middle, and gently pull it open. |
|
|
23. Square out the bottom by running your fingers around the inside of it, especially into the corners.
|
|


