How
to Fold an
Origami
|
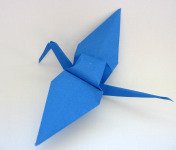
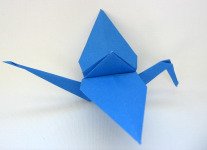 Here it is: the Icon of Origami—the most popular
and well-known model, the
Here it is: the Icon of Origami—the most popular
and well-known model, the 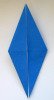

|
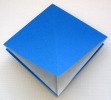
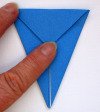
1. Start with a square base, also known as the prelimary fold.
|
|
|
Task 2: Make a crane base.
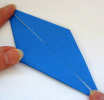
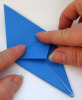
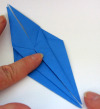
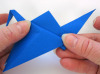
2. Grabbing two layers of paper, fold
the lower left flap and lower right flap in to the center line.
|
|
|
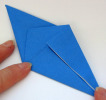
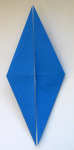
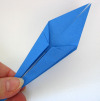
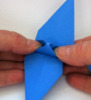
3. Turn the model over.
4. Repeat Step 2, forming a kite shape. |
|
|
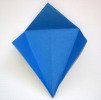
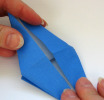
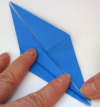
5. Fold
down the top triangle, making a crease from point to point across
the model. |
|
|
6.
Unfold back into a square.
You've formed "helper creases" that you are going to use in the next
steps.
|
|
|
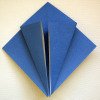
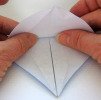
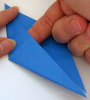
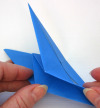
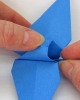
7.
Carefully peel up the top layer of
paper.
|
|
|
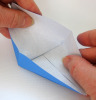
8.
Begin to fold the top layer back
on the cross-wise crease you made in Step 5.
9. Work your thumbs along the
helper creases, so that the far edge begins to fold toward the center.
10.
Continue gently speading the tips apart and folding the edges
toward the center. |
|
|
11.
Begin to press the model
flat. Watch those tips and keep them neat!
|
|
|
12.
Turn the model over.
13.
Repeat everything, starting with Step 5 where you fold the top triangle
down. |
|
|
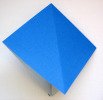
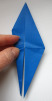
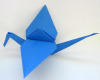
14. Tah dah! The Crane
Base.
|
|
|
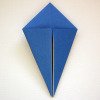
Task 3: Make the neck, head, and tail.
15. Moving on to make the traditional or flapping origami crane...
|
|
|
16.
Working with one of the legs,
fold the top layer in half to the center.
|
|
|
17.
Important: If you are making a flapping crane, skip this step.
|
|
|
18.
Turn the model over and repeat the previous fold(s).
|
|
|
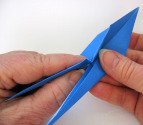
19. Fold one of the "legs" up to where it attaches to the body. A "leg" is actually the neck and head (or tail).
20. To make the next fold easier, also fold it to the back on the same crease. Crease well. |
|
|
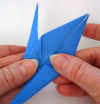
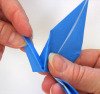
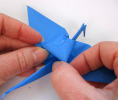
21. Unfold
the last step, and stick your index finger in between the two layers of
the neck (or tail).
|
|
|
22. The process you used to make the neck is called an inside reverse fold.
|
|
|
23. Repeat Steps 19-21 to make the tail. If you are making a flapping crane, go to Step 26. |
|
|
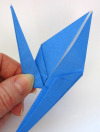
24. Fold one wing down to where it attaches to the body.
|
|
|
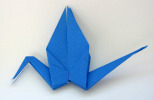
25. To finish the traditional origami crane, fold the other wing down.
|
|
|
26. For the flapping crane, the tail must still be "fat."
|
|
|
27. Push the wings up a little higher than horizontal. |
|
|
28. To make it flap, grasp the front corner and the tail.
|
|
|
29. To give the traditional origami crane a puffy body, first insert your thumbs in the body to spread the layers. |
|
|
30. Continue gently spreading and pressing down on the point until you achieve the shape you want. |
|