
How
to Fold an
|
 This heart model is nice because it uses a half sheet of paper,
which lets
your paper go twice as far. This
is a
good thing if you’re making several
This heart model is nice because it uses a half sheet of paper,
which lets
your paper go twice as far. This
is a
good thing if you’re making several 
|
1. Cut
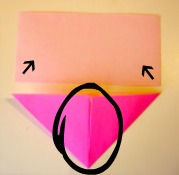
a square piece of paper in half. 2. Start
with the white side up, if there is one. 3. Fold the two lower corners up to meet the top edge, forming a triangle.
Tip: The most
important thing is to make the two
edges meet neatly in the center because this will be the front
of the heart. |
|
|
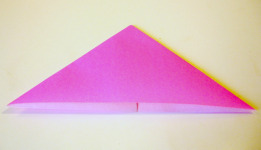
4. Turn
the model over and orient as shown. |
|
|
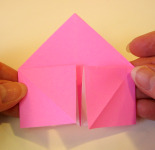
5. Fold
the outer corners up to meet the tip, forming two small triangles.
|
|
|
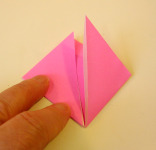
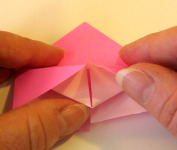
6. Lift
one of the little triangles you just made.
|
|
|
7. On the
outside, squash-fold into a small square. |
|
|
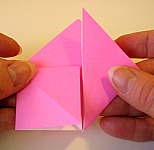
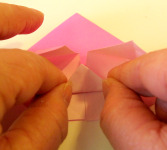
8. Repeat
the squash fold with the other small triangle, and you have this:
|
|
|
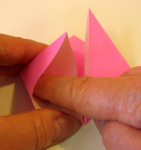
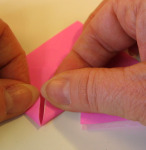
9. Lift
the top most layers of the little squares you just made. |
|
|
10. Fold
the point up, in half.
|
|
|
11.
Press
everything flat again. |
|
|
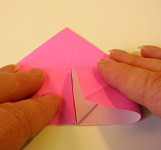
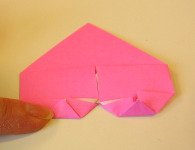
12. Working
with both layers of one of the little squares, grab the outer corners
and fold them to meet in the middle. If you're working with thicker paper, or making an extra large heart, fold the corners one at time. Start by folding the inner corners down as far as they will go. |
 |
|
13.
Fold the points you
just made in half. You
might want to put a spot of glue under these points.
|
|
|
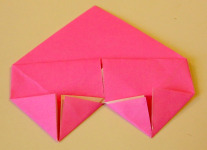
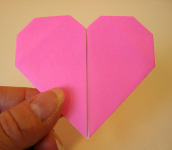
14. Turn
over. Tah dah!
|
|

See
other Valentine project ideas