| |
How to Make Your Own
Double-Sided Origami Paper
If you want to
make a model where both sides of the paper show, consider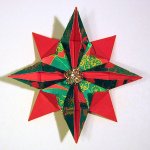 this technique for gluing two sheets of paper together. this technique for gluing two sheets of paper together.
This process can also be used to stiffen and strengthen thin papers, such as foils.
I call it "laminating" because, when you use the adhesive I recommend,
the two pieces are perfectly joined into one piece, with no wrinkles.
Shiny or glittery holiday wrapping paper can be laminated to itself or
to basic origami paper. For this 8-point
star, I laminated
foiled wrapping paper to red origami paper.
I recommend a paper trimmer
to cut the paper to size after laminating.
|
Materials
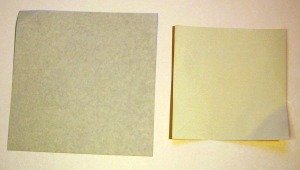
- Two pieces of
paper, one larger than the other. Can be origami paper,
wrapping paper, or any combination of light-weight papers.
Neither piece of
paper has to be square.
The smaller piece should be at least the size you want for your model.
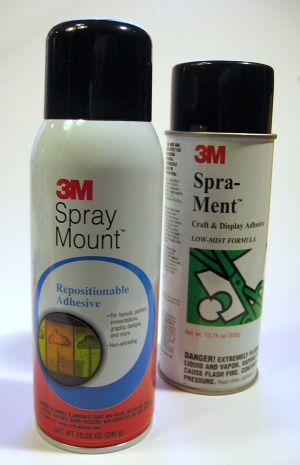
- Spray adhesive.
My favorite is 3M Spray Mount.
Spray-Ment is my second choice. I found these at my local
specialty art-supply store:
Artist and Display.
1.
Thoroughly read the instructions
on the spray can.
Note: Some
products include a wait time of a few seconds before putting the papers
together.
|
|
|
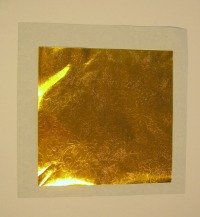
2.
Lay the papers colored side down
on newspaper or other scrap paper.
Spray the smaller piece with the adhesive.
|
|
|
3.
After any wait time, lay the
smaller piece on the larger one.
Carefully smooth out the top piece.
Allow to dry and trim to size.
|
|
Back to top of Double-sided Origami Paper
Browse
the
Origami Model Library
All About
Origami Home

|
