| |
How
to Fold an Origami
Swan
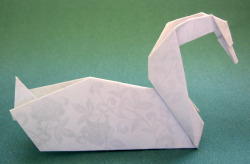 This graceful swan is from The World of Origami by Isao Honda. This graceful swan is from The World of Origami by Isao Honda.
The beautiful white-on-white patterned paper is Kotobuki Sekkasukashi.
It can
take some practice to achieve the angles you want in the head and neck,
so we suggest
saving your fancy paper until you have the process down.
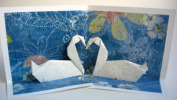
This is our favorite swan model because of the way a heart is formed when you place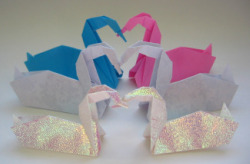 two beak-to-beak. two beak-to-beak.
Once you master this model, consider making a pop-up card.
Tip: This model includes several reverse folds. For a good illustration of how to make a reverse fold, look at the photos in Step 14.
Materials
1 sheet of perfectly square paper
Click
to see cutting tips.
|
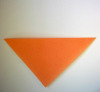
1.
Start with the white side up.
Fold in half, corner to corner.
Unfold.
|
|
|
2. Fold two adjacent sides to the center
line.
|
 |
|
3. Unfold completely and fold the tip in
a tiny bit.
How far you fold it determines the width of the beak: the farther you
fold it, the thicker the beak.
|

|
|
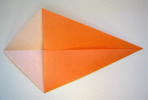
4.
Refold the two adjacent sides.
|
|
|
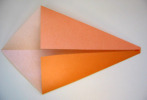
5.
Fold the same two sides in
again. Keep the tip as neat as possible.
|

|
|
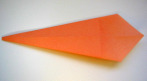
6.
Turn
the model over.
|
|
|
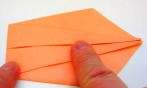
7.
Fold the model in half, side to
side (beak to tail).
|
|
|
8. Fold the neck on the angle shown.
Notice how the fold the begins slightly back from the lower left corner.
|
|
|
9. Pick the model up and fold the body in half. The neck will naturally fold in half.
Crease the neck and body well.
|
|
|
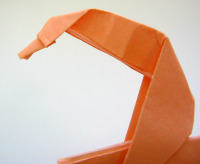
10. Now you are going to shape the neck with a reverse fold.
First, make a "helper crease" by folding the neck as shown.
Unfold and reverse fold using the center crease and the helper crease.
It's like flipping the neck inside out.
|

|
|
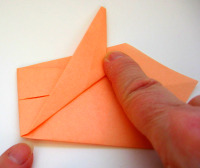
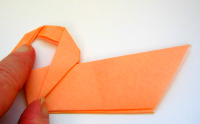
11. Use another reverse fold to make the head, but this time you will flip down instead of up.
First, make the helper crease.
Then unfold and flip inside out.

| 
|
|
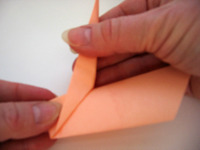
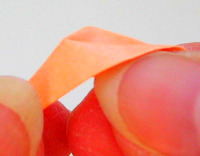
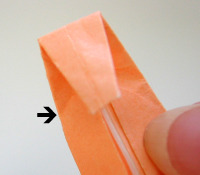
12. Now for the beak! It consists of two folds.
First, open the head by unfolding the last step.
Make the first beak fold. Notice the relationship of this fold to the crease for the head (arrow).
Fold the beak back with a tiny fold.
Refold the head and... Voila!
| 
|
|
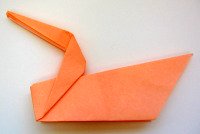
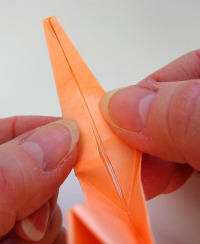
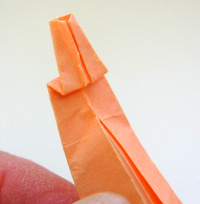
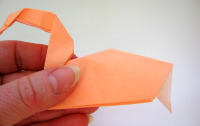
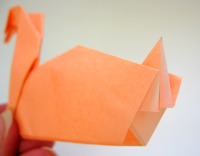
13. Now let's smooth out the swan's chest.
First, fold the triangular piece as shown and crease as well as you
can. You might find it helps to fold it toward the back also.
Then, unfold and push the point in, using the creases you just made.
| 
|
|
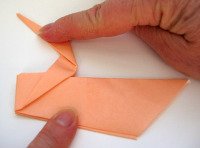
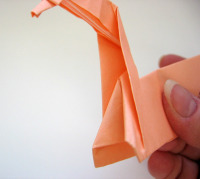
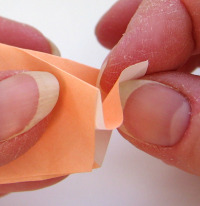
14. Finally, the tail! This is two simple reverse folds.
The first reverse fold starts by making helper creases. Do this by folding the tail toward you.
Unfold and push in, using the helper creases.
top
|

|
|
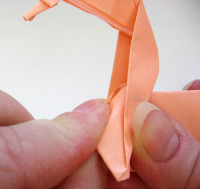
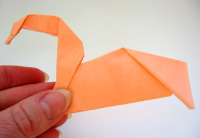
15. For the second reverse fold,
grab the tail and fold up as shown.
Nice work!
Click for pop-up card instructions.
| 
|
Back to top of Origami Swan
Browse
the
Origami Model Library
All About
Origami Home

|
