logo for all-about-origami.com
leftimage for all-about-origami.com
 

How to Fold an Origami
Betta Fish

origami-betta-fish.jpg
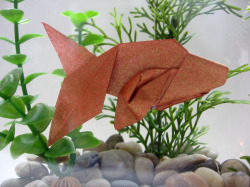
This origami betta fish is our adaptation of a goldfish in The World of Origami by Isao Honda.origami-fishbowl-v2.jpg

A neat way to display this fish is suspended in a fishbowl, minus the water.  Click for how-to.

This model includes some rather tricky reverse folds, similar to those in the neck and tail of the traditional crane.

If you are adept at making the crane, you should have no problem making this origami betta fish.  If not, we suggest practicing reverse folds by making a crane from our instructions.

Regardless of your experience, we suggest practicing this model with some basic paper before using your fancy paper.

Materials 
1 sheet of perfectly square paper  Click to see cutting tips.
Scissors


1.  First make a square base.

2.  Then from that, make a crane base.


Position as shown. >

origami-betta-fish01.jpg


3.  Fold the top flap to the left.


origami-betta-fish02.jpgorigami-betta-fish03.jpg

4.  Fold the entire model in half by folding the lower half up.
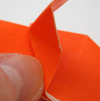


origami-betta-fish04.jpg

5.  Fold top left flap to the right.  This will be a front fin.
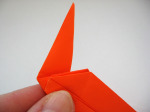
 

origami-betta-fish05.jpg

6.  Turn the model over and fold the back fin. 
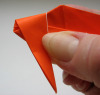
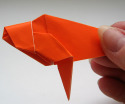
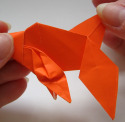


origami-betta-fish06.jpg

7.  Fold the corner of the fin up.  You are going to reverse-fold it.
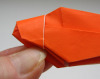

This is the helper crease.  To make the reverse fold even easier, you might want to fold it the opposite way as well.


Unfold, spread the corner open, and push the corner inward.


When completed, the reverse fold should look like this.  >


Repeat on the other fin.

origami-betta-fish07a.jpgorigami-betta-fish07b.jpg
origami-betta-fish07.jpg

8.  Now we're going to make the head from the piece between the fins.


First, fold the head piece all the way behind the model.


origami-betta-fish08.jpg


9. Then fold it down.


origami-betta-fish10.jpg

10. Finally, tightly tuck the remaining bit up into the slot farthest to the back side.


origami-betta-fish11.jpg

11. Make a helper crease in the front fin by folding it forward and back.
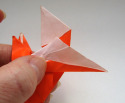
 

origami-betta-fish12.jpgorigami-betta-fish12a.jpg

12. Unfold, spread the fin apart, and gently flip it inside out.
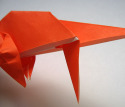

Use your own artistry to shape it the way you like.


Repeat with the fin on the other side.

origami-betta-fish13.jpgorigami-betta-fish14.jpg

13.  Cut the tail piece in half up to where you run into another folded piece.


origami-betta-fish15.jpg

14. Get ready for another reverse fold by folding one of the tail fins forward and back.
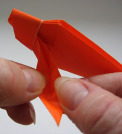


origami-betta-fish16.jpgorigami-betta-fish16a.jpg

15. Reverse fold the fin.
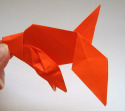


origami-betta-fish17.jpg

origami-betta-fish18.jpg

16. Fold the top lay of the fin toward you.

   origami-betta-fish19.jpg

17. Repeat with the back fin.
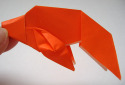
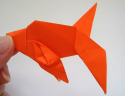

This is the completed goldfish as described by Isao Honda.  Top

origami-betta-fish20.jpg

18. To make our version, fold one of the tail fins up.

origami-betta-fish21.jpg


19. To make the top fin more slender, fold one side to the middle.


You might like it like this.
Or...


origami-betta-fish22.jpgorigami-betta-fish23a.jpg

20. Or, you can do the same thing to the lower fin.


This is a challenging model.  Congratulations!


Go to the fish bowl howto

origami-betta-fish24.jpgorigami-betta-fish25.jpg

Back to Top of Origami Betta Fish 

Browse the Origami Model Library

All About Origami Home

footer for origami page