| |
How
to Fold a Two-In-One
Origami Hat
 This
easy origami hat is our adaptation of
one in Origami by Toyoaki
Kawai. This
easy origami hat is our adaptation of
one in Origami by Toyoaki
Kawai.
Not only is it easy, but when made from
newspaper, it's really cheap fun!
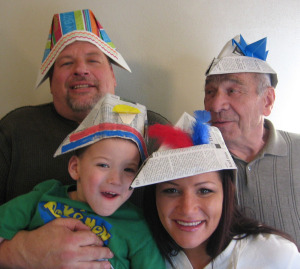
We call it a "two-in-one" hat because you
can wear it two ways for two totally different looks.
All four
hats in the photo are the same model. The only difference is
the placement on the head.
Folding and decorating
origami hats makes a great party activity.
Provide a variety of embellishments for your
guests to decorate their hats. It's guaranteed to be a hit and a
lot of laughs.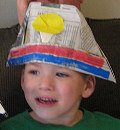
Because this hat is so easy, in only a few
minutes, you could pre-make a bunch of
hats in various sizes and let your guests focus on decorating them.
For young Ryan, age 4, we made a smaller hat
from an 18" inch square.
We provided Ryan with big Sharpie poster markers and a pre-made yellow morning
glory. Grandpa was quick to grab a crane
for his origami hat.
 A package of inexpensive feathers offered Mom the
classy look she wanted. A package of inexpensive feathers offered Mom the
classy look she wanted.
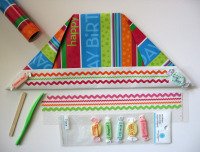
Over-achieving Dad made his hat from
birthday-themed wrapping paper
and decorated the edge with rub-ons,
with help from Ryan. Seriously, wasn't Dad a good sport!
Candies and plastic jewels to glue on are
some other ideas.
If money's no object, you can go wild
providing various fancy items from the scrapbook section of your local
craft store.
A great alternative to newspaper and
wrapping paper is white or colored
banner paper available at most craft stores.
Materials
This hat can be made from just about any kind of paper that is at least
18" on its shortest edge. A full
sheet of newspaper (24" x 21¼) is perfect for adults. Cellophane tape is handy for
repairing tears.
(Actually, you can go smaller: A 13¾-inch square of origami paper
makes a darling little hat, but requires two bobby pins - and some hair
- to hold it
on.)
The paper can be square or rectangular. And, unlike most origami
models, it doesn't have to be cut perfectly (if you need to cut it at
all).

For one of our workshops, we used French newspapers that were 23 x 13½
inches, like some community newspapers. This size required
cutting to 18 x 13½, and a tweak to
the base instructions, which we include in the steps below. You
might prefer a hat like this.
Let's
get
started!
Photo courtesy of Artist and Display
|
1.
The side of the paper that's down will be the main part of the
hat. The side that's up will be the brim.
Note: We're
using a piece of regular origami paper for demonstration purposes. (It
makes a cute doll-sized hat.)
|
|
|
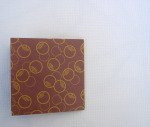
2. Fold in half, top to
bottom.
If using a sheet of newspaper, turn it 90° and use the existing middle
crease. (Reading orientation works fine, too. This is just
easier.)
|
|
|
3. If you are folding a full sheet of
newspaper, skip this step.
If you are folding a square piece of paper, fold in half again, side to
side.
Note:
The only purpose of this crease is as a visual landmark. You'll
probably find you can skip this step after you've made one hat.
Unfold.
|

|
|
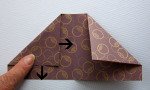
4.
Double-check the folded edge is
at the top.
If using newspaper, fold the two upper corners down until the lower
edge of the folded piece is about 2¾ inches from the lower edge.
This is easy to "eyeball" because the gap in the middle will also be
about 2¾ inches.
For square paper, the arrows are showing that the distance to the
center crease and the distance to the lower edge should be about the
same.
|
Note:
Actually, how far down
you fold the corners is arbitrary. Play around and see what
effect changing these folds has on the size and shape of the hat!
For the smaller-sized French newspaper
described in the introduction, we found we needed to fold all the way
to the lower edge.
|
|
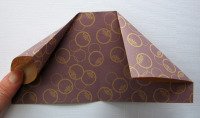
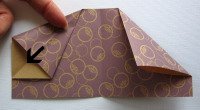
5.
Now you're going to squash-fold the two triangular flaps
you created in the last step. Here's how:
Lift one triangle and run your finger or hand inside the pocket toward
the point.
On the outside,
align the crease line with the folded edge (arrow), and press flat.
Repeat on the second triangular flap.
Tip: If
you're having trouble with this step, practice making a square
base. Task 2 of those instructions provides a detailed
tutorial on this type of fold.
|
|
|
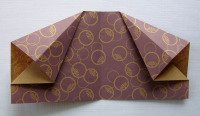
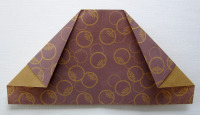
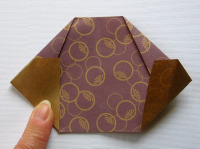
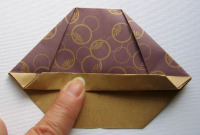
6.
Turn
the model over.
Fold the two upper edges back on the existing
crease lines.
|
|
|
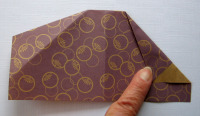
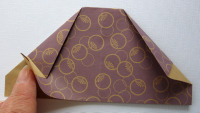
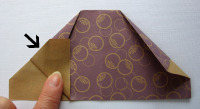
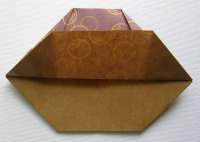
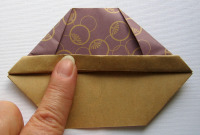
7.
Working with the lower left
corner, peel up the top layer.
Fold so that the edge indicated by the arrow is aligned with the folded
edge underneath.
Repeat on the other corner.
Turn the model over and repeat on the other side.
|
|
|
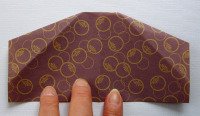
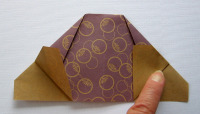
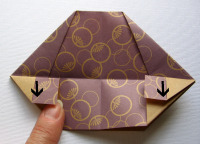
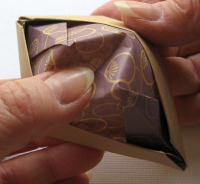
8.
Fold the top layer up as far as
it will go, which is the widest part of the model.
Crease well and unfold, allowing the two flaps marked with arrows to
come down also.
|
|
|
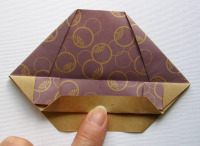
9.
Now you're going to form the brim of the hat in three folds.
Do this by folding the section below the horizontal crease line in thirds (quarters if you want a
skinny brim). One...
Two...
Finally, roll it up one more time on crease you made in Step 8.
Three!
Crease well.
Flip the model over and repeat.
|
|
|
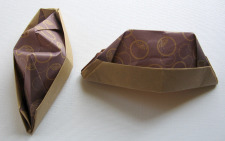
10.
Opening the hat will hold the brim in place, but a couple of tape
"donuts" work nicely, too.
Wear it peak-forward or sideways, with or without a dent in the top.
Have fun making origami hats at your next party!
|
|
Back to top of Origami Hat
Browse
the
Origami Model Library
All About
Origami Home

|
