
How
to Fold an
Origami
|
 This origami lily is our adaptation of
one in
This origami lily is our adaptation of
one in  This lily is not recommended as a first project. But
if you are comfortable making a
This lily is not recommended as a first project. But
if you are comfortable making a 
|
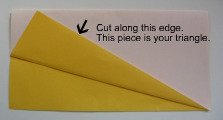
Task 1: Cut
an equilateral triangle. 1. Fold one piece of paper in half.
|
 |
|
2. Fold the top layer along the line,
but adjust the left corner so that it meets
the top edge ... (The fold won't be exactly in the middle of
the side.) ...and ends exactly
at the corner on the right.
|
  |
|
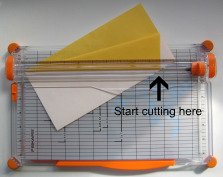
3. If you're using a paper trimmer,
start the cut on the side opposite from the skinny point
|
  |
|
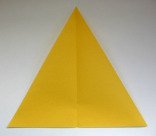
4. Open the white piece to reveal your
perfect equilateral triangle!
|
 |
|
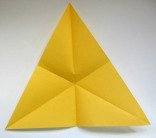
Task 2: Fold
a three-petal lily. 5.
You
already have one crease running from a point to the opposite
side.
Make two more creases like it by folding the paper in half two more
times.
|
  |
|
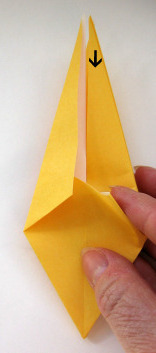
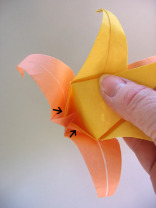
6.
Place
the paper colored side down (if any). You are going to fold the
lower half up on the creases indicated by the arrows.
|

|
|
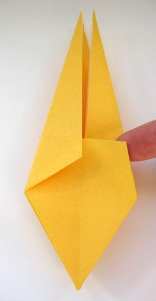
7.
Fold the lower half up, bringing
all three tips together.
|
  |
|
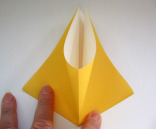
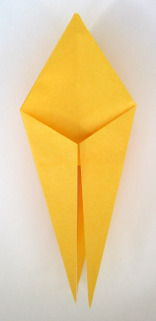
8.
Spin the model around and
squash-fold a triangle. |
  |
|
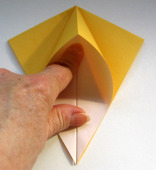
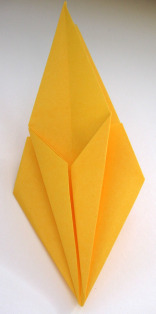
9. Page-turn the flaps and squash-fold the two remaining large flaps.
|
   |
|
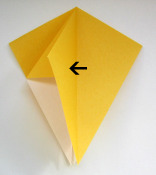
10.
Fold the edge to the center line.
|
  |
|
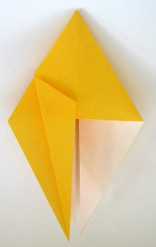
11.
Spin the model around and unfold
one of the sides. |
 |
|
12.
Starting at the tip, as indicated by the arrow, refold the side.
|
  |
|
13. Page-fold so you have a solid side like this. |
 |
|
14.
Fold the short sides to the center line.
|
|
|
15.
Curl the petals using a pencil, pen, or dowel.
|
 |
|
16.
Make the second three-petal lily.
|
|
|
|
  |
