|
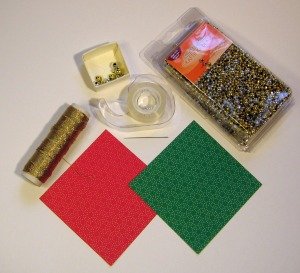
Materials
- Two pieces of square paper, the same
size. Can be the same color or two coordinated colors.
- A needle with a large eye.
- Thread.
- Cellophane tape.
- Beads* (optional).
- Glitter spray (optional).
*Be sure the holes in the beads you select are large enough for the needle.
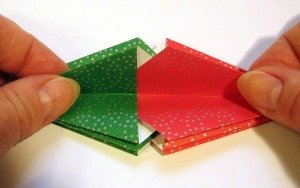
|
|
|
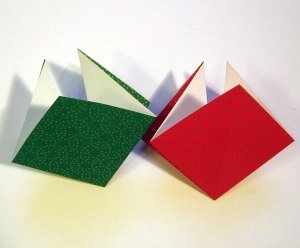
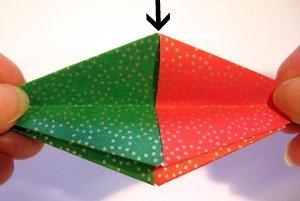
1. Fold
the paper into two
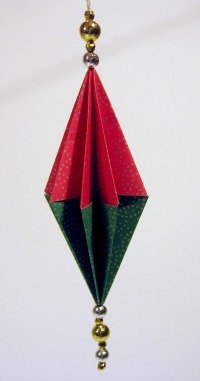
square
bases.
|
|
|
2.
To strengthen the paper for
stringing and beading, unfold each piece and put a piece of tape over
the center point on the white side.
Use a creasing tool or back of a spoon to rub the tape to ensure it is
securely attached.
Use the needle to poke a hole in the center point through the tape and
paper.
|

|
|
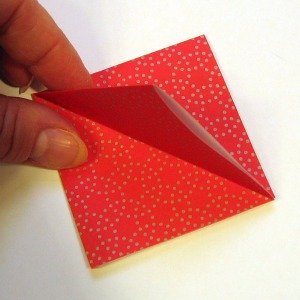
3.
Refold the bases, creasing well
at tip where the tape is.
Notice each base has four triangular flaps.
|
|
|
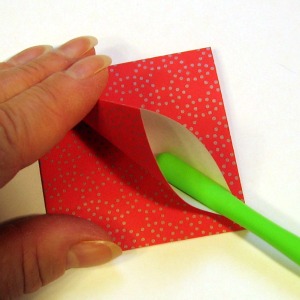
4.
You are going to squash-fold
each of the four flaps.
A blunt tool helps open the flap.
The green object is my favorite creasing tool. Read more about it on this tips page.
|
|
|
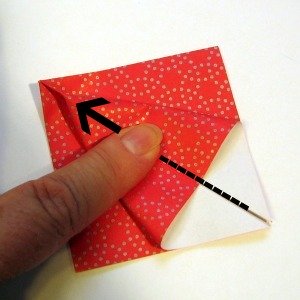
5.
As you squash each flap, be sure
to line up the crease as indicated by the dashed line.
To make the tip nice and neat, as you flatten it, move your finger or
creasing tool in the direction of the arrow.
Squash the other three flaps. Repeat with the other base.
|
|
|
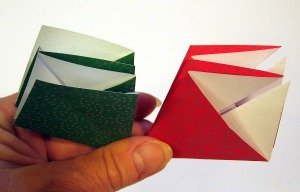
6.
You end up with two kite-shaped
pieces.
|
|
|
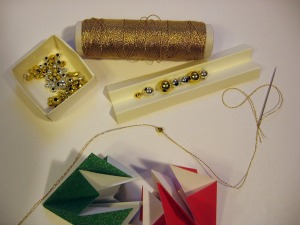
7. Cut a generous length of string, more
than twice as long as the finished ornament.
Plan the sequence of beads you want.
I made a box
and simple V-shaped holder to organize my beads.
If using beads, thread the lowest
bead onto the string.
|
|
|
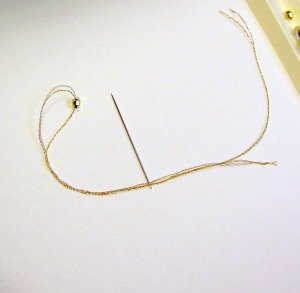
8.
Thread the second end of the
string through the needle.
You will be working with a double string from now on.
If you are not using
beads, decide how you want to hang the ornament. You could
use a small button or tie a very large knot in place of the bead.
You could let the knot show below the bottom point, or hide it inside
the top half.
|
|
|
9.
Thread the rest of the lower
beads on the doubled string.
Then add the two bases, using the holes you made previously.
If you are not using
beads, thread either one or both of the bases onto the string,
depending on how you decided to hang it.
|
|
|
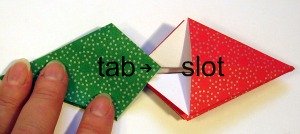
10.
Collapse the bases as shown, one
as a solid "kite" and one with white showing.
The two pieces interlock using a "tab-into-slot" technique. Each
piece has four tabs and four slots.
|
|
|
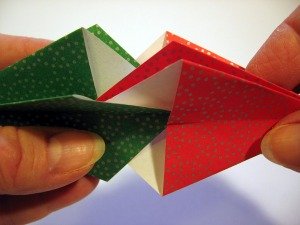
11.
I find it easiest to start by
picking up both pieces.
I try to get as many tab-slot pairs lined up as possible without being
too fussy at this point.
Do not push the pieces together yet!
|
|
|
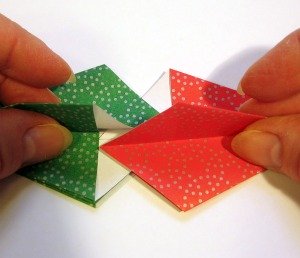
12.
Lay them down and begin checking
and aligning each of the tab-slot pairs.
Glance ahead to the next photo.
This process might require a great deal of patience; hang in there!
|
|
|
13.
Once all eight tab-slot pairs
look like this, you can begin to push the pieces together.
Gently pull any slack out of the string as you do this.
|
|
|
14.
Gently push the pieces together
until all eight points (indicated by the arrow) are nice and tight.
|
|
|
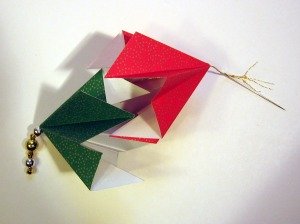
15.
Add the top beads, tie a knot at
the desired length, and you have your beautiful beaded origami ornament!
You might like to spray it with glitter spray for extra sparkle.
|
|