| |
How to Fold an
Origami Star of Bethlehem
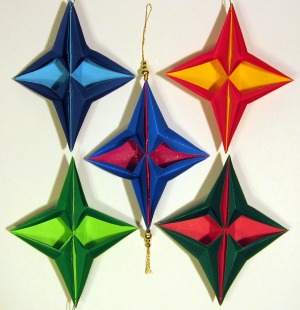 This origami star is an old traditional design that I call the Star of Bethlehem because of its shape. This origami star is an old traditional design that I call the Star of Bethlehem because of its shape.
You can entertain kids and folks of all ages when you show them how to fold this origami star.
It magically pops into shape at the last step, revealing the
inside color.

See the blue star with beads? To string the beads, I glued the string
in the crease on the back, as shown here. >
To give it sparkle, I also sprayed the star with gold
glitter after folding it.
This star is also available as a class. Click for info.
Materials
- One piece of square paper, any size, but 6-inch is
recommended. Double-sided is ideal. For tips on making your own double-sided paper, click here.
- Glitter spray (optional)
|
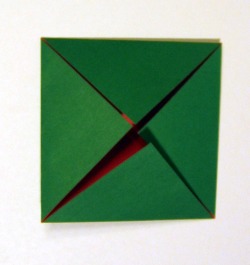
1. When you start folding, the side of the paper that's up will be the inside color.
Make a blintz fold by folding the paper side to side, both ways. Unfold completely and fold all four corners to the center.
For detailed blintz-fold instructions, follow Steps 1-4 of the masu box.
|
|
|
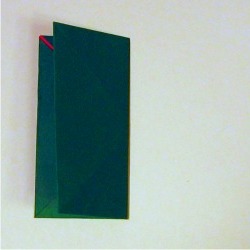
2. Without unfolding the blintz fold, fold the paper into a square base, starting by folding the paper in half.
|
 |
|
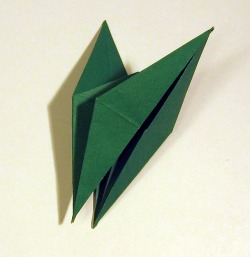
3. Fold the square base into a crane base.
It will look and feel a little different because you're working with double-thick paper.
And it's double-thick why?
Right, because you started with a blintz fold.
|
|
|
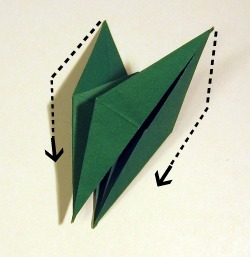
4. Fold both of the crane "wings" down using the existing cross-wise crease.
| 
|
|
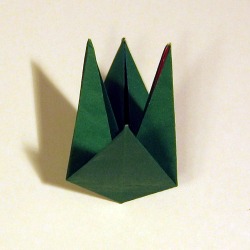
5. Spin it around so it looks like a tulip.
|
|
|
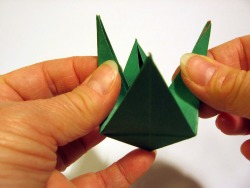
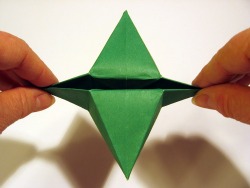
6. Grasp the two inner "petals" and place an extra finger on the center point. I'm using my pinkie.
|
|
|
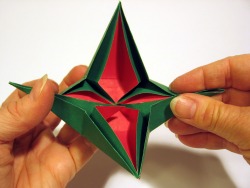
7. Gently pull the two inner "petals" out and down, while simutaneously pushing the low point up and in.
If your folds were precise, the star will usually pop into shape, but if it doesn't, the next step may help.
|
|
|
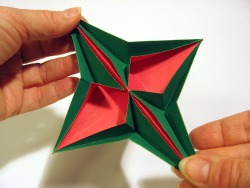
8. Turn it over and check the back. Get it to look like this photo, if it doesn't already.
|
|
|
9. Tweak the star until you like its shape.
Embellish your origami star any way you like. Enjoy!
|
|
Back to top of Origami Star
Browse
the
Origami Model Library
All About
Origami Home

|
